I still may try to resume painting today, but you’ll have to settle for a link and previously posted picture in the mean time.

I still may try to resume painting today, but you’ll have to settle for a link and previously posted picture in the mean time.
Today I went to Strategies, wrote out a token Ork and Goblin 1500 point army list, and invested money I don’t really have into Warhammer 8th Edition. I didn’t buy any minis but the big red book isn’t cheap. I also am more and more sure I didn’t get the job where they planned to make a decision Thursday or Friday. You never know I’ll politely inquire Monday afternoon if I don’t hear anything.
After spending too much time hanging around the local gaming store, I spent more time hanging around one of the many cafes on Main Street, then when I got home I read and flipped through the big red book some. Eventually after a modest meal I took a break and promptly fell asleep on my bed. I’ve been trying to get out and exercise a bit more and I think it hit me this evening. 
I had planned to do a little more work on my many miniature painting projects. I actually laid out two plaguebearers and another Foundry WW1 rifleman before my impromptu nap. When I got back up it seemed hotter than when I went to sleep. I started cleaning the models and must not have been fully awake as I managed to slip while rotating my exacto knife and cut myself on the inside of my index finger. I got a fresh reminder of the true colour of blood and after patching myself up I returned to the modeling table with more focus on the task at hand.
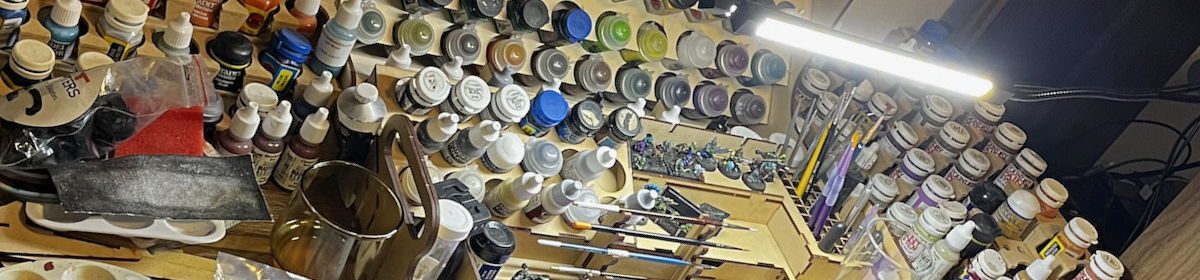
These three newly cleaned and prepared for painting models, will get some beach sand and some black primer before I go to bed and after exciting domestic chores tomorrow I’ll probably resume painting the three models behind them. They are a test Chaos daemon which I plan to paint a very dark purple, a second test Khorne bezerker, and a test Servant of Decay. Hopefully I can crank them out pretty quickly as my painting queue seems to be getting longer instead of shorter.
I want to finish off my 2010 Vancouver Astronomi-con army promptly, but now I need to paint some lesser daemons of Nurgle by the end of the month so I might do them before the three rank and file models I need to do for my Astro army. That still leaves me the big three models for this year’s Astronomi-con.
 In other hobby news Zac’s blog network is up and at it. He came up with some membership criteria which may be even stricter than From the Warp or the Bell of Lost Souls network. I’m not sure how much traffic these blog networks generate, but the answer is some. One of the reasons I set up a dedicated hobby blog was to apply for membership in probably all three of these networks. I may need to wait five more months before I can apply to the Table Top Gaming News one. Some people in the networks are selling something, miniatures, painting services, hobby products, even ad space, but most are just hobbyists. I just want some of my ramblings to get read. Plus if I go to all the trouble of preparing a tutorial I hope it is eventually of use to somebody.
Speaking of which, my one true tutorial so far on this blog, is for a WW1 Canadian Corps rifleman. I used Purity Seal the model but I think a little too much may have landed on his lid. Anyway it is just a test model, I also took some effort and used the bright haloegen lamp on my painting test to try and show that I did indeed paint the eyes of this 25mm figure.
Well that is all for tonight, look for more ramblings, and work in progress photos this weekend as I have no shortage of miniatures to paint. I just hope it isn’t too hot in Vancouver. I still have some terrain to do on the trench table and will probably do some sort of rust painting tutorial in conjunction with it.

As promised I stayed up in the heat and finished my WW1 Foundry Rifleman test model, which I painted in the colours of the Canadian Corps circa mid to late 1916. Furthermore I made the miniature a member of the Van Doos, but I almost forgot to paint distinctive shoulder markings. 
This is the final of four blog postings about painting this model. It was painted beside the original test model, and another test model this one for my Servants of Decay army which I’ll be doing for next years Astronomi-con Vancouver. But the focus of this post is how I did my second and better but still not perfect Canadian WW1 infantry soldier.
 Here is the recipe so to speak, any colours I don’t list a manufacture for are probably made by GW (Citadel):
That’s it, I recommend sealing your model the next morning when it is good and dry with a Matte Sealant. I may use Purity Seal, I may use Krylon, but I’ve read and been told that Testors Dullcoate is the best. 
 If you’re going to paint a platoon of these guys you can try to cut corners, use only part of the Triads, the Foundry Drab Triad all three colours are quite different but if you have faith, thin your paint, and feather in a bit… Anyway experiment with the triads, try just the B with the C as a highlight or maybe the A with a B highlight, try leaving out some of the washes, use just one metal colour etc. etc.
I also used the P3 Wet Palette for most of these colours which ensure you thin your paint at least, but maybe it is too much. It definitely isn’t necessary I’ve painted 100’s of minis without one. I don’t use my metallics in the wet palette, I’m worried about contamination. Now to take the final pictures and then try to get some sleep.
So I suppose this is the third post in a series on my ever under refinement method for painting WW1 Canadian Corps rifleman, particularly Van Doos… Maybe I’ll make a proper tutorial when I got all the kinks worked out. I’ve made tutorials as I go before, but I also know the value of test miniatures when you plan to do an army or even just a platoon which is the current plan for the Van Doos. 
So to recap the metalics, paint the weapon Boltgun Metal. When dry do a thin armour wash, I mixed my own but you can use Badab Black if you want. Then do a wetbrush or a drybrush if you care less of Chain Mail once the wash is dry. You can then call the metals good enough, and I made sure to take a picture at this stage.
 Or you can add a little character, for the Foundry Rifleman miniature I used Gryphonne Sepia wash in splotches to age and dirty his gun just a bit. The Servant of Decay (the plastic GW Orlock) was to get a more elaborate rusting of his weapon using a series of DIY washes starting with thinned rust brown ink, adding in various pigments, Mecharius Solar Orange, Firey Orange, until I tired of it or I went too far. The paints are all GW, the rust brown ink is an old and valued GW ink, and the pigments come from a variety of companies. AwesomePaintJob.com rust triad of pigments is quite good though it can be tough to open their containers. The pigments have served me better than the washes which have separated a lot on me in two out of three cases.
For the normal human flesh I used Foundry Triad number 5 just for simplicity sake. I did do things differently than the uniform, I applied the B or base colour to most of what I wanted flesh. I left some black showing and I put on basically a coat and a half. I think used the A or shade version and painted where shadows would fall, finally I painted the C or highlight member on the triad on fingers, knuckles, cheeks, noses, chins, etc. This is pretty good, apparently historical painters often don’t do eyes.
I decided to take a picture and update the blog as I’ve never had the best of luck with flesh washes. I have GW’s original flesh wash, something like four different pots of it. It seperates too much and is too brown. I have the new Ogryn Flesh wash and it is probably a little too brown for me, so I cook up my own using old GW inks, Rust Brown and Plasma Red. At least that is what I’m going to try.
The rifleman is mostly done at this stage, the Servant of Decay is more work and has fallen a bit behind. The helmet, water bottle, and ‘putties’ will be painted Foundry Triad Drab #12. This is an alright colour and one I used for a variety of gear on the original test model, the Imperial Guardsmen in the photos.
After that I just have to do the boots and base. I’ll also give the flesh probably a post wash highlight of Foundry Triad #5C and do the eyes white with either a black or blue iris/pupil. The Servant of Decay will be more work, but might be finished by the end of tomorrow. The rifleman I hope to finish everything except the base tonight, but maybe I’ll do the base too, what the hell.
There has been considerable discussion on the Lead Adventure forum on how a Canadian Expeditionary Force uniform should look, circa 1916, for a rifleman in the Royal 22e Regiment…
So three posts in one day, after five days of silence, what can I say other than I’m back baby! Actually the last two postings could have been done as one, but I wasn’t sure I’d keep painting. It is still hot in Vancouver and although it is almost midnight I really don’t have any reason to get up early now that the World Cup is over.
Continuing with my test model the next thing to paint on the Foundry Rifleman who will serve in the Van Doos eventually is the 08 Pattern Webbing. This is famously canvas rather than leather when the first Canadians were shipped over to Europe. By 1916 all Canadian troops had 1908 pattern British webbing, my army is going to be circa mid 1916 so will have 08 Webbing, Lee-Enfields, and helmets. 
For my first Foundry Triad test model I wasn’t satisfied with the Canvas colour (Triad #90), it tends towards green. In the pictures and in the real example I’ve seen the canvas is yellow. The other colour I ordered and tried was Drab as it was recommended somewhere, it is Triad #12 and has been ruled out for 08 Webbing. While I’ve been painting terrain and other models I’ve tried out some GW and Vallejo colours. For the Foundry Rifleman miniature I used Iyanden Darksun which if you can’t tell by the name is a GW Foundation paint. I also tried Denab Stone on the Orlock.
 The secret though is the Gryphonne Sepia wash this is probably the most useful GW wash of the newest batch. I use it to achieve a variety of effects, one thing I use it for is to “age” stuff, it also can darken and add a grittiness though if you use a lot of it the model will get a bit shiny. What I should have done is possibly two basecoats of the Foundation paint then a Gryphonne Sepia wash, or Foundation base coat, wash, then Foundation again as the first highlights. It all comes down to how much time you want to spend on your webbing.
What I did for the Foundry Rifleman test model was one coat of Iyanden Darksun, one layer of highlights of Vallejo Beige (Model Colour 917), and then a reasonable Gryphonne Sepia wash. After that was dry I did some edge highlights of Vallejo Beige again. I think I needed the two base coats of Denab stone and to delay using Beige and possibly GW’s Bleached Bone is a closer colour to use as a highlight, I gave the shirt and tabbard of the Orlock an extra wash and highlights with Bleached Bone, some people seem to paint their webbing more beige than yellow, we’ll see what the Lead Adventure Forum folks have to say, it looks yellow to me in prints, photos, and surviving examples.
It is 12:14 AM here Pacific Standard Time, timezones another Canadian invention, anyway it is also time for bed. I’ll paint the weapons and the skin next as I’ve pretty much decided to give the Foundry Flesh Triad (#5) another go, possibly with a wash or an even lighter highlight from a GW flesh colour. The Orlock as a test Servant of Decay will get a rather unnaturally unhealthy blue grey skin tone.
Hot weather isn’t good for painting, at least if you’re relatively poor and live in an old building…

You must be logged in to post a comment.